How To Create and Set Up Your Custom Blog Email Address
4:23 AMWant to learn how to create and set up your blog email? Here’s how you can create a professional email for your blog domain.
Do you want your own custom email address for your business? For example, mine is michelle@makingsenseofcents.com.
If you want something other than yourname@gmail.com, and something more professional, this is something that you can easily do too.
In fact, I recommend that all business owners do this.
When it comes to creating your website, having a business email is important because it helps create a professional image as well as builds trust for your business.
Today, I will show you exactly how to do this, either free with Bluehost, or paid through G Suite. Either way is easy and I highly recommend choosing one of them.
If you haven’t started a blog yet, I recommend first starting with my tutorial – How To Start A WordPress Blog.
Related content on how to create a blog:
- How To Start A Blog Free Course
- How To Earn Money Blogging: Your Top Questions Answered
- How To Start A WordPress Blog On Bluehost
- 12 Free Resources To Grow Your Blog Fast
- How To Write and Publish Your First Blog Post On WordPress
How to create and set up your blog email address.
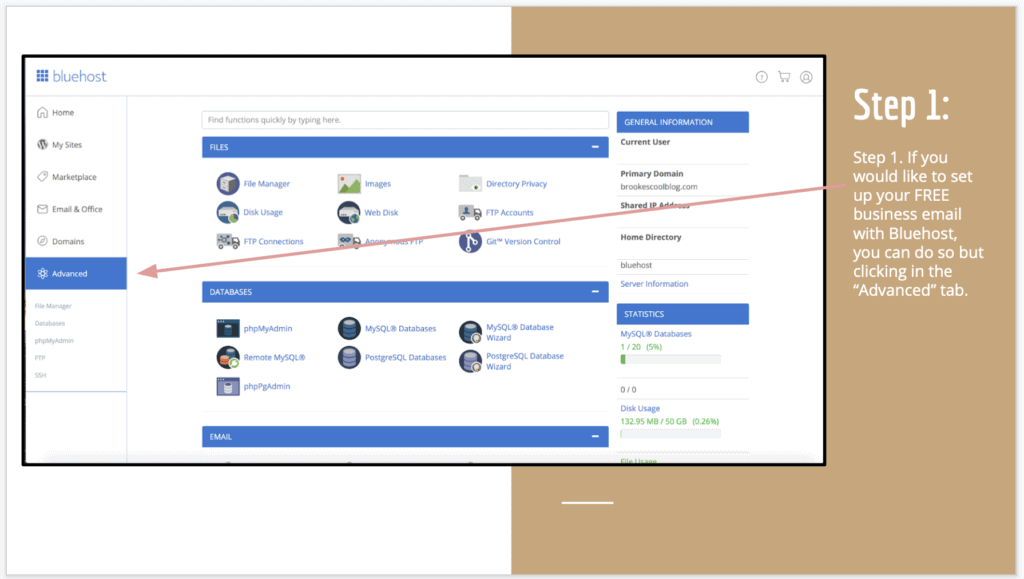
Step 1: Click on the Advanced tab.
If you would like to set up your free custom blog email with Bluehost, you can do so by first logging into your Bluehost cPanel, and then clicking on the “Advanced” tab.
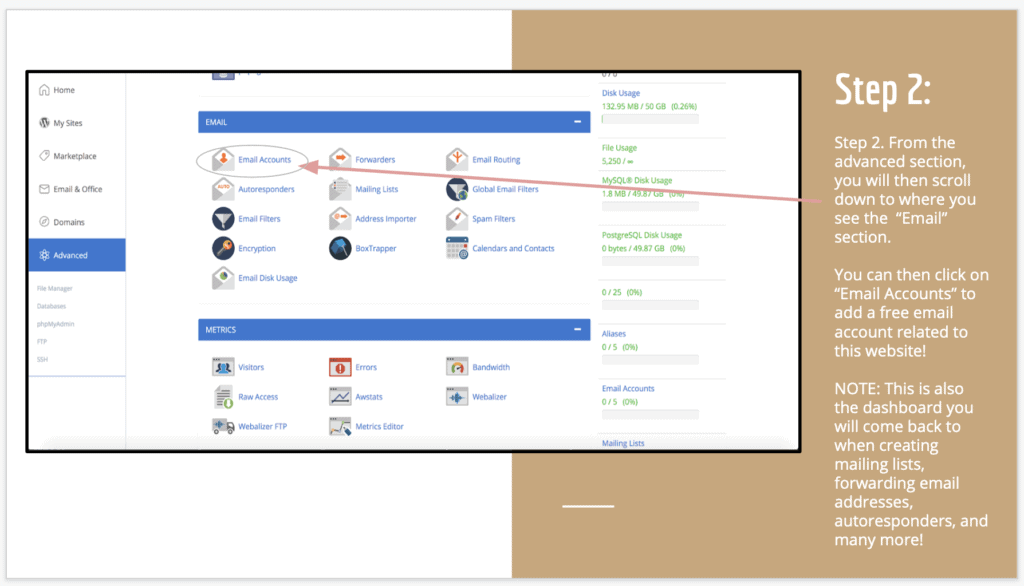
Step 2: Click on Email Accounts.
From the advanced section, you will then scroll down to where you see the “Email” section. You can then click on “Email Accounts” to add a free email account related to your website domain name.
Note: This is also the dashboard you will come back to when creating mailing lists, forwarding email addresses, autoresponders, and many more.
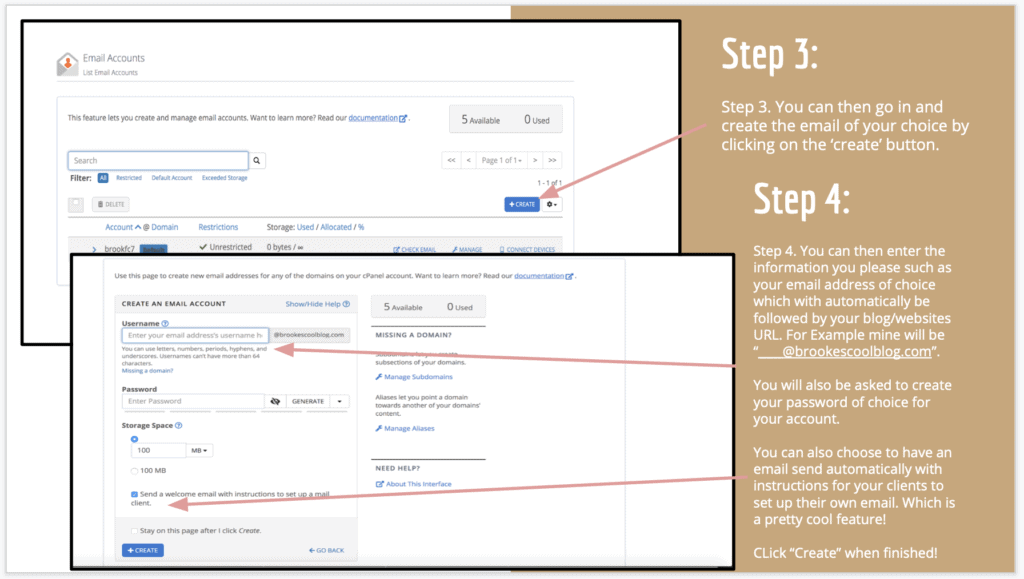
Step 3: Create an email account.
You can then go in and create the email of your choice by clicking on the ‘create’ button.
Step 4: Create your password.
You can then enter the information you please such as your email address of choice which with automatically be followed by your blog/websites URL.
You will also be asked to create your password of choice for your account.
Click “Create” when finished!
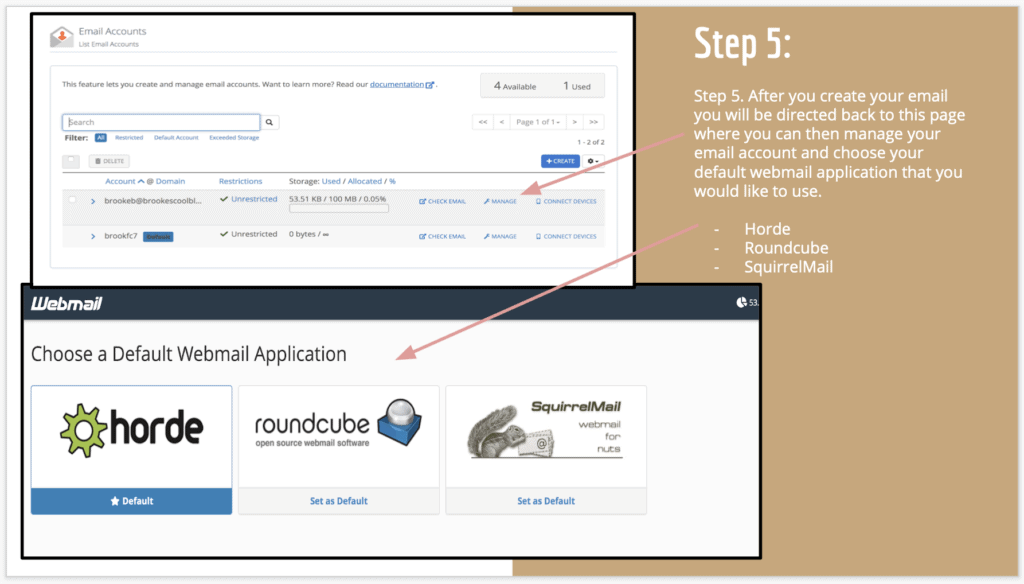
Step 5: Choose your webmail application.
After you create your email you will be directed back to this page where you can then manage your email account and choose your default webmail application that you would like to use.

Step 6: How to check your mail.
Based on the Webmail application you choose your email will look like 1 of these 3 examples above.
You can access this by clicking on “Check Mail”.
And, that is all that you need to do. You can now send emails from your new custom email address.
Setting up your paid business email address in your Bluehost dashboard with GSuite!
Now, if you would prefer to use Google, you can do that as well. For me, I use Google (G Suite). It does cost money, though. Below are the steps for this.

Step 1: How to create a custom email with G Suite.
Bluehost offers two different options for emails, Microsoft Office 365 starting at $4.99 per month for the basic package or G Suite for $6 per month with all the features you need.
I recommend G Suite as that is what I use.

Step 2: Choose your pricing.
G Suite allows you to either pay monthly or yearly. If you decide to pay yearly you will actually receive two months free.
You may also choose the amount of users you want for this email.
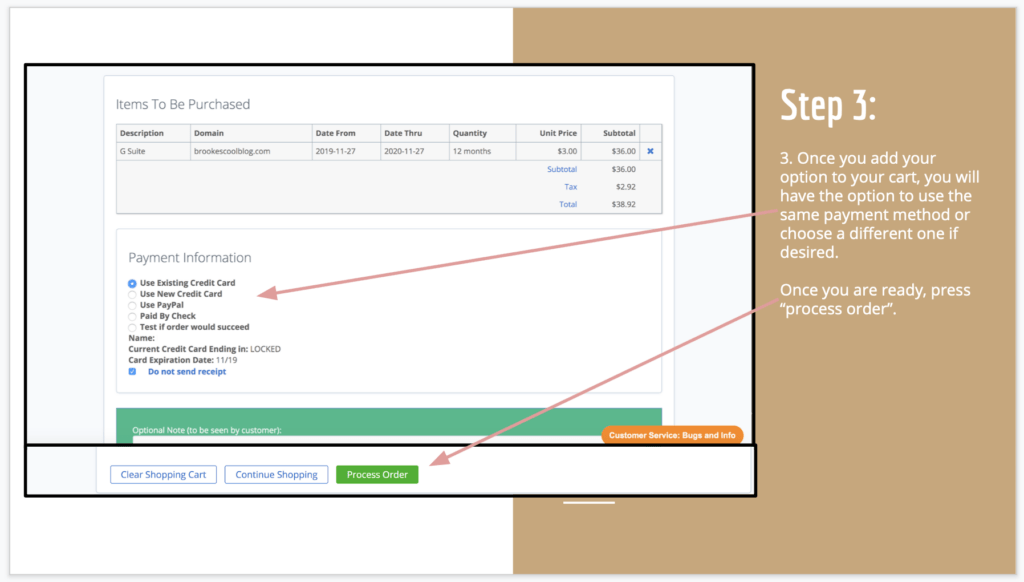
Step 3: Pay for your order.
Once you add your option to your cart, you will have the option to use the same payment method or choose a different one if desired. Once you are ready, press “process order”.
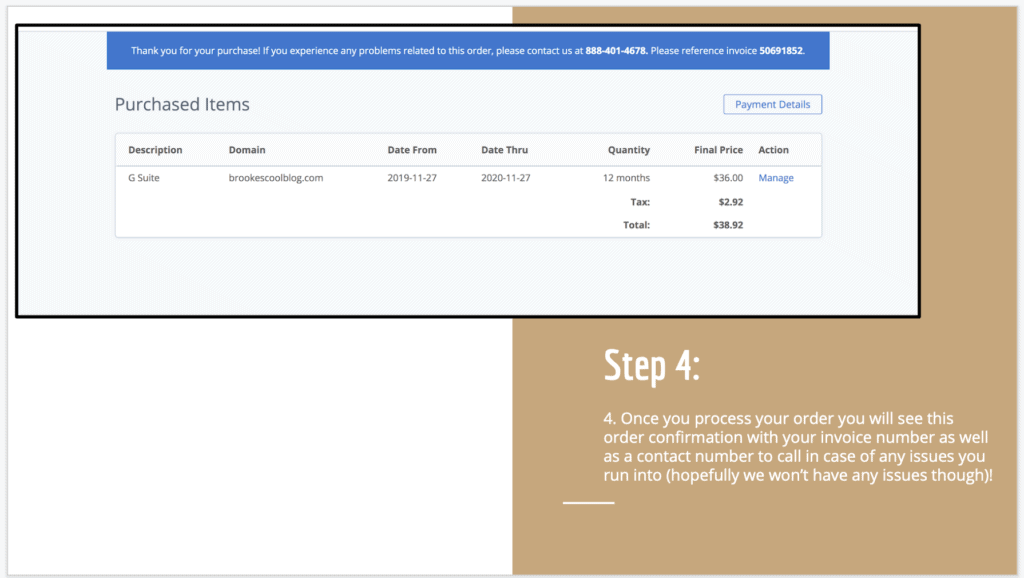
Step 4: Order confirmation.
Once you process your order you will see this order confirmation with your invoice number.
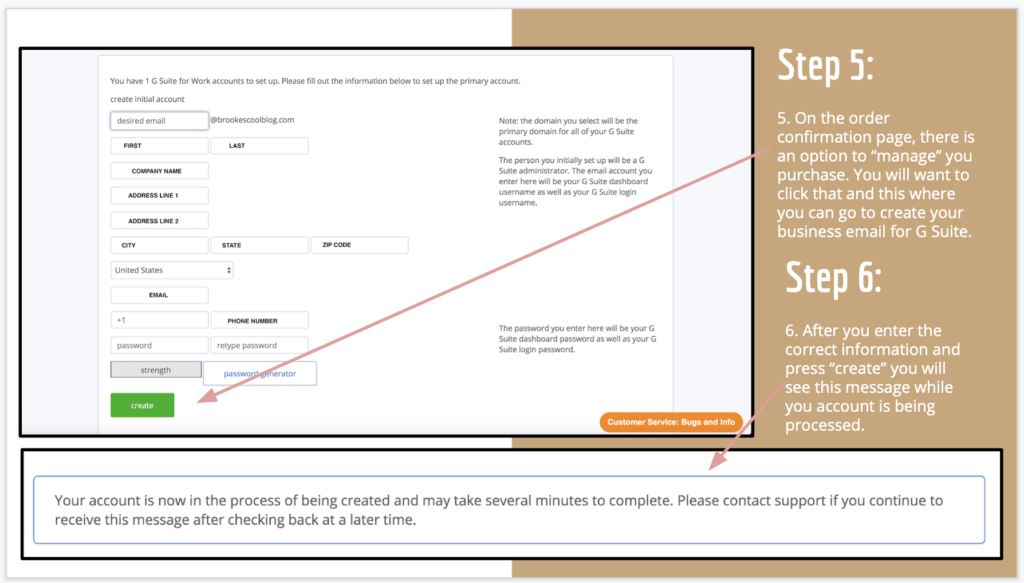
Step 5: Create your business email.
On the order confirmation page, there is an option to “manage” you purchase. You will want to click that and this where you can go to create your business email for G Suite.
Step 6: Press the create button.
After you enter the correct information and press “create” you will see this message while you account is being processed.

Step 7: Log in to your new custom business email.
Click “G Suite login” button to log into your Gmail email account. You will then enter your email and password.

Step 8: Send and receive emails.
You will then be brought to your G Suite Admin Console where you can access all of your data, reports, billing, domains, users, and many more.
From here, you can now receive and send emails through this email account. You are all set up and ready to go.
You now have a custom blog email address.
Do you have a blog?
The post How To Create and Set Up Your Custom Blog Email Address appeared first on Making Sense Of Cents.
from Making Sense Of Cents
via Finance Xpress
0 comments